We may earn money or products from the companies mentioned in this post.
Irresistible healthier vegan no bake Samoa bars! Made with date caramel, dark chocolate and almond flour shortbread crust. NO baking and ready in 30 minutes!
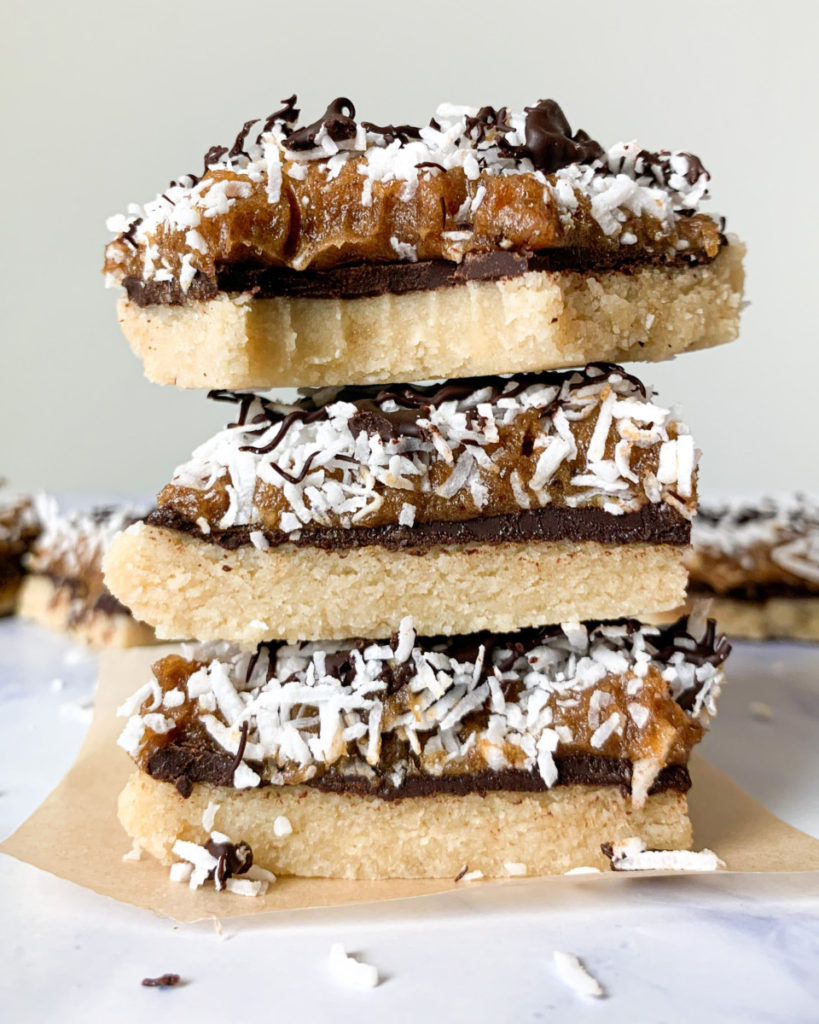
Girl scout cookie season all year round, who is with me?
I just LOVE a classic girl scout cookie and even recreated thin mints to make them vegan, gluten-free and oil-free (you can check out that recipe here! Highly recommend- so good!) but sometimes a no bake recipe just hits the spot! And these healthier vegan no bake samoa bars hit just right, my friends. I have already made about 6 batches of these and everyone loves them!
All you need is about 30 minutes start to finish! I definitely recommend making a double batch or maybe even hiding some because these go fast. Really really fast. I’m just looking out for ya.
They are vegan, gluten-free, no bake, refined sugar free, refined flour free! Let’s get started!
How to Make Healthier Vegan No Bake Samoa Bars
I know the directions look long and detailed but these bars are so so easy to make! You will pop this in and out of the freezer multiple times so the layers can set, so most of the allotted time comes from the freezer time!
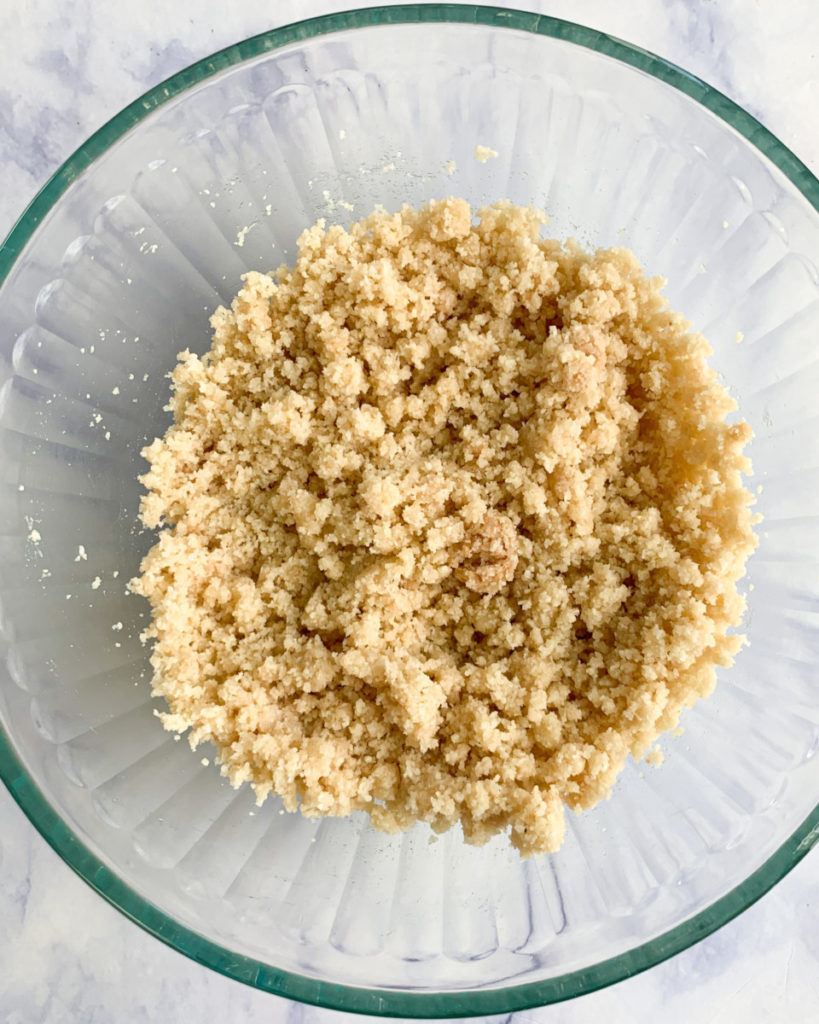
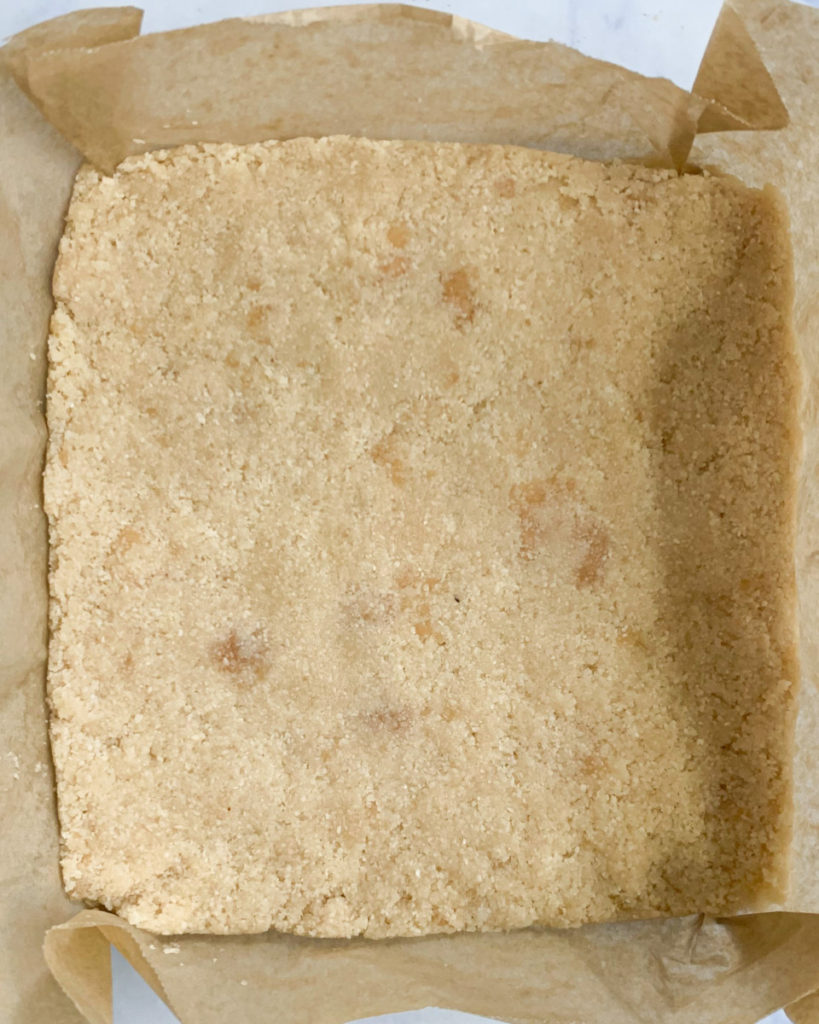
The shortbread crust is made up of blanched almond flour, coconut oil, maple syrup, vanilla extract and a little salt. It take 5 minutes to mix in a bowl. Your mixture should look crumbly, like below, but easily hold it’s shape when pressed together.
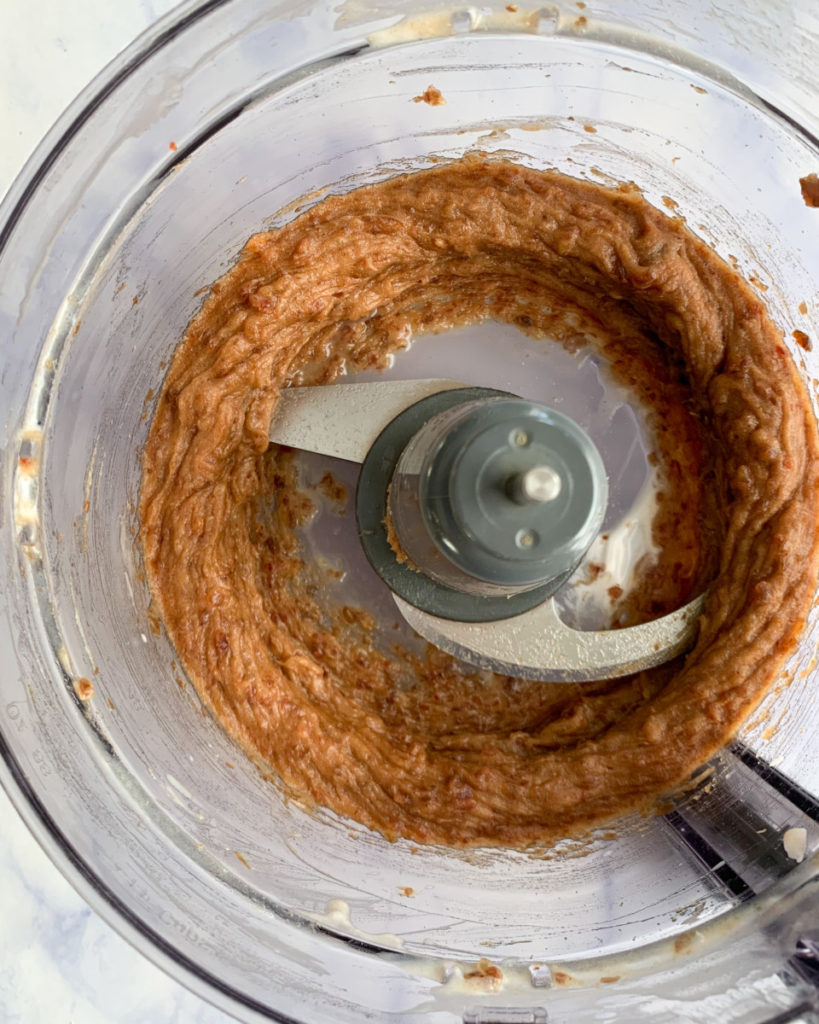
This date caramel is just absolutely divine. If you tried out my vegan salted date caramel cups then you know that date caramel is pretty much irresistible! And it’s super easy to make: just add dates, coconut cream, vanilla extract, salt and a little water to a food processor and done!
Below is a high level breakdown of how to make the bars, and you will find a more detailed outline in the instructions box below.
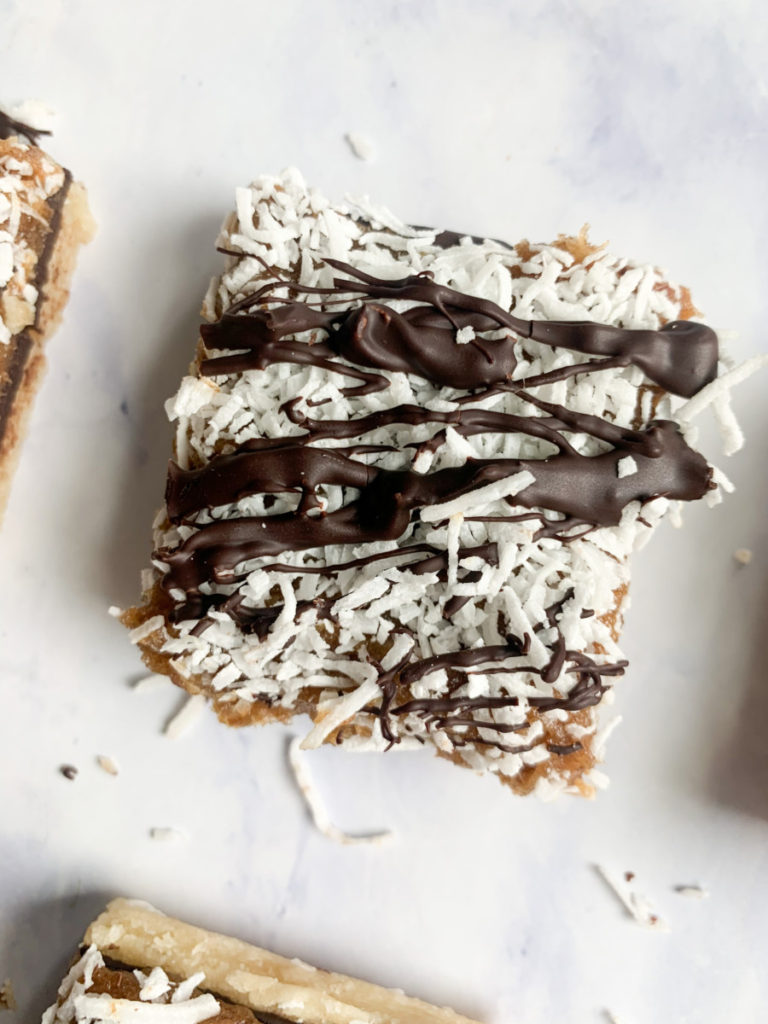
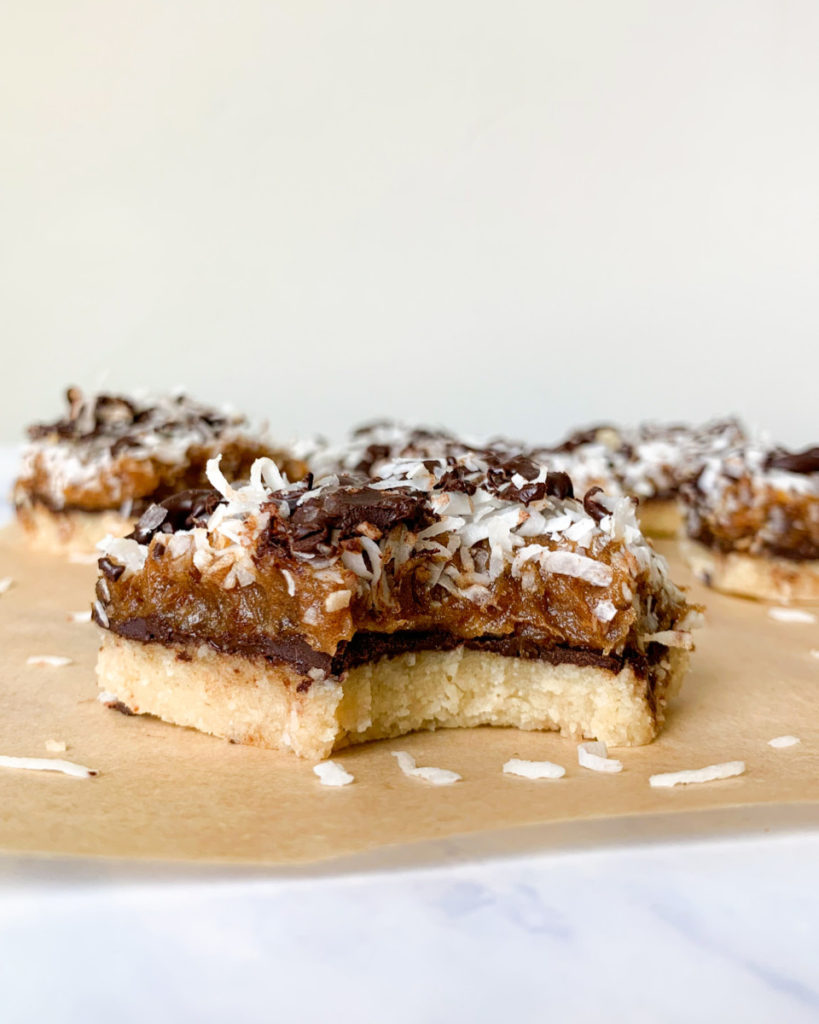
The layers are as follows from bottom to top:
- shortbread crust
2. dark chocolate
3. date caramel
4. shredded coconut
5. chocolate drizzle
You will start with the first layer, the vegan shortbread crust, and simply mix everything in a bowl and then press it into the baking dish.
Then, pop the crust into the freezer and make your date caramel and melt your chocolate.
Add your melted chocolate to the crust, put it back in the freezer so it can set, and then top the dark chocolate layer with date caramel and the shredded coconut.
Back in the freezer it goes for a little bit, then slice into 9 bars, add chocolate drizzle and refrigerate until ready to eat! Easy peasy.
I hope you enjoy these healthier vegan no bake Samoa bars!
If you make this recipe, I would love a rating and comment below! Don’t forget to take a photo and tag @wholesome.crumbs on Instagram!

Healthier Vegan No Bake Samoa Bars
Equipment
- You Will Need: an 8×8 baking dish, parchment paper and a food processor
Ingredients
- 1/2 cup vegan dark chocolate chips
- 1/2 cup unsweetened shredded coconut
Vegan Shortbread Crust
- 2 cups blanched almond flour
- 3 tbsp melted coconut oil somewhat cooled before mixing
- 3 tbsp pure maple syrup
- 1 tsp vanilla extract
- 1/8 tsp salt
Vegan Date Caramel
- 1 cup medjool dates, packed your dates should be moist, plump and somewhat sticky. If they are dry, soak them in hot water for about 10 minutes.
- 2 tbsp coconut cream from a can of full-fat unsweetened coconut milk
- 1 tsp vanilla extract
- 2 pinches salt
- 1 or 2 tbsp water to thin
Instructions
- The layers are as follows from bottom to top: shortbread crust, dark chocolate, date caramel, shredded coconut, dark chocolate drizzle. Grab a large mixing bowl and line your 8×8 baking dish with parchment paper.
- First, start on your shortbread crust as this is the bottom layer. Combine all of the shortbread crust ingredients into the bowl and stir well (make sure the melted coconut oil has somewhat cooled). The mixture should be crumbly, but easily hold its form when pressed together. See photos above. Note: make sure to evenly distribute the wet ingredients when adding them to the almond flour. This will ensure the dough mixes properly.
- Add the shortbread crust to the lined 8×8 baking dish in an even layer (again, this will be crumbly but don't worry!). Now, get those hands ready and start pressing! You want to press down on the crust really well so that it sticks together. Use a spatula to get in between the outside edges of the crust and the parchment paper to form straight even edges, like in my photo above.
- Put the crust in the freezer for 10 minutes while you make your date caramel and melt your chocolate chips.
- First, make your date caramel. Simply add all of the ingredients to a food processor and pulse until smooth. Set aside.
- Next, melt your dark chocolate chips. Add 1/2 cup dark chocolate chips to a microwave safe bowl and microwave in 30 second increments, stirring well in between, until melted. Mine usually take about 1 minute to fully melt. Note: make sure to stir really well before you put the chocolate chips back in the microwave. Sometimes all they need is a good stir to fully melt and you don't want to burn them!
- Take the crust out of the freezer and add your melted dark chocolate on top of the crust (layer #2). Leave a little extra melted dark chocolate in the bowl for drizzling on top of the bars. Use a spoon or spatula to spread the melted chocolate over the crust in an even layer.Put this back in the freezer for 5 minutes so the chocolate can set.
- Next, once the chocolate has set, add your date caramel on top of the chocolate layer (layer #3). Spread evenly. Then top the date caramel with the shredded coconut (layer #4).
- Put this back in the freezer for about 10 minutes ( I know, bare with me!) so that it firms up before you slice it into squares (you will add the chocolate drizzle after slicing).
- Once the chocolate is firm enough to cut, slice into threes both ways so you have 9 bars. Add melted dark chocolate drizzle on top (layer #5) and then place in the fridge until ready to eat. Keep the bars covered in the refrigerator. I like to keep these refrigerated for several hours, even overnight, before serving. Enjoy!
Notes
- Keep the bars covered in the refrigerator. I recommend making these ahead of time before serving- either several hours or the day before. While they are totally fine to eat right away, I personally like waiting to eat these because the layers set nicely in the fridge the longer they are in there.

Easy to make and DELICIOUS!
Yay! 🙂 Thank you!
So easy! I had all the items to make this in my pantry already so whipping it up was simple. I haven’t tried the finished product yet but tried all of the elements individually and YUM. These are going to be dangerous!
Hope you enjoyed!! 🙂