We may earn money or products from the companies mentioned in this post.
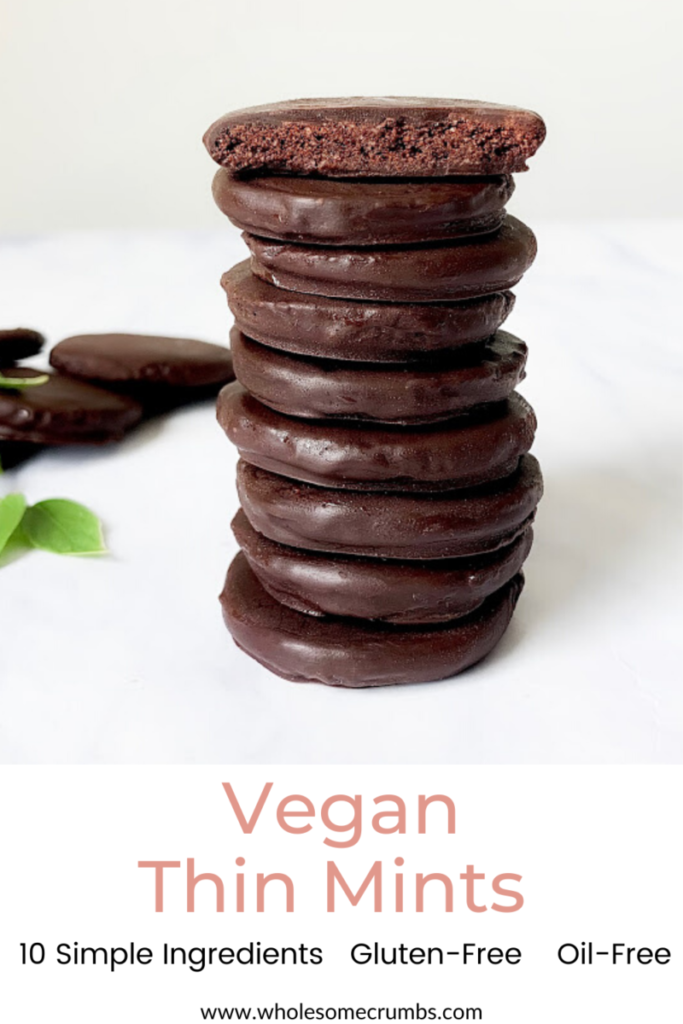
These healthier vegan thin mints are downright delectable and easy to make at home! 10 simple ingredients, gluten-free, oil-free and made with no refined flour and no refined sugar!
Huge thin mint lover here! If you are reading this, then I guess you are too 😉
I don’t really need to go on and on about how great classic thin mints are but how no so great the ingredients are so let’s just jump right into the details on this amazing recipe, shall we?
note: please make sure to read through the “how to make” section below as there are important notes for the recipe!
These vegan thin mints are seriously so delicious. I’ve had many people taste test these and everyone loved them, some even saying they preferred these over the original thin mints!
They are dairy-free, egg-free, gluten-free, oil-free, made without refined flour or refined sugar and are easily made in one bowl with no fancy ingredients or techniques. This recipe is a little more time consuming than my usual recipes because you have to roll out the dough and use a cookie cutter, but it’s so worth the extra time!
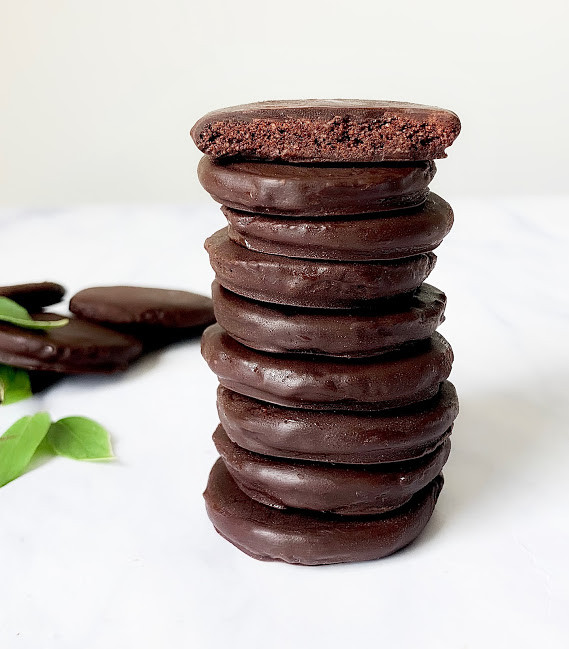
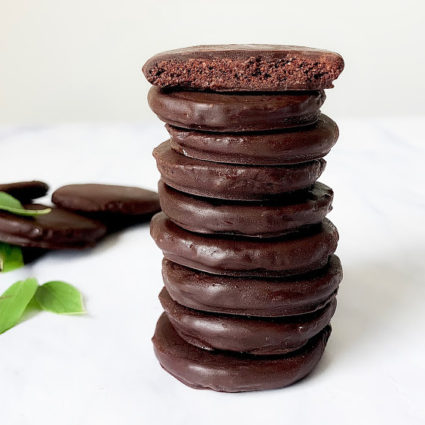
Ultra chocolatey, minty and crispy cookies covered in minty dark chocolate. And since these vegan thin mints are made with clean ingredients, you really don’t have to feel too guilty when you open up the freezer door multiple times a day to shovel these in your mouth. Just speaking from experience.
Also, yes, freezer door, because I developed this recipe specifically for the cookies to be stored in the freezer and enjoyed straight from the freezer because everyone LOVES frozen thin mints! Is there even another way to eat them??
Key Ingredients
To keep these vegan thin mints clean and light, I opted for ingredients like blanched almond flour, unrefined coconut sugar, pure cacao powder and natural peanut butter.
Peanut butter? Don’t worry…these cookies have zero taste of peanut butter in them. I use this to add fat as the recipe is oil-free. The chocolate and the mint cover up any trace of peanut butter taste! I get the best textural results using peanut butter that’s been refrigerated.
For the minty taste, I use pure peppermint extract. This is different from peppermint oil and if you are using peppermint oil, you will only use a few drops. It is much stronger than peppermint extract.
How to Make
First, grab your ingredients and a mixing bowl.
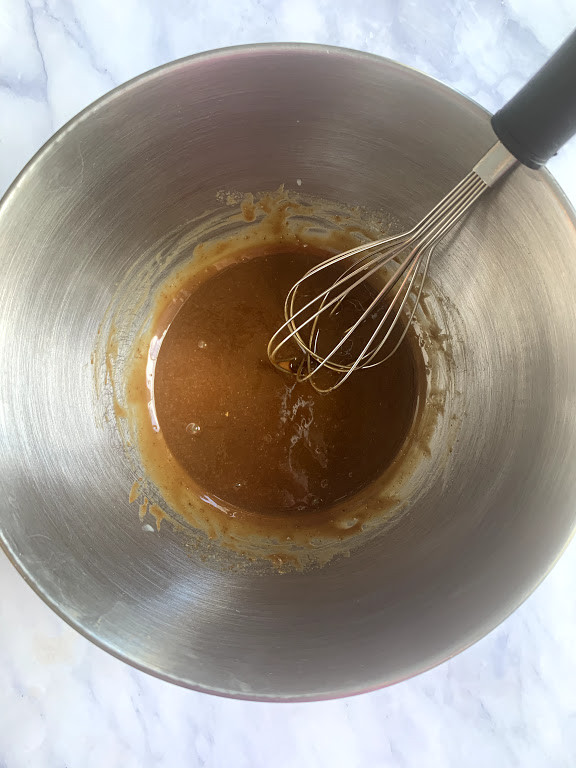
Add all of your wet ingredients to the mixing bowl and whisk well. You will definitely need to whisk this as you want to get any clumps out of the ingredients. Also- make sure your peanut butter is smooth and creamy and not hard and dried out. Since it is replacing the oil, the cookies texture relies on the creamy peanut butter.
Once your wet ingredients are whisked well, add all of your dry ingredients to the bowl. Mix with a spatula. I find it vital to use a small spatula to mix this. You want to really get in there and mix good. The dough will look way too sticky at first but keep mixing, using the spatula to fold the dough over, pressing down into the dough to compact the ingredients into a big ball.

Refrigerating the dough isn’t a necessity as I’ve tested multiple batches each way. But I noticed it’s so much easier to roll when it’s been sitting in the fridge for a little bit. So, put the dough in the refrigerator for about 15 minutes while you clean up, preheat the oven and get your rolling pin, parchment paper and cookie sheet ready.
Rolling the Dough
Lay out a piece of parchment paper on the counter top. Roll the dough into a big ball and place it in the middle of the parchment paper. Then, add another piece of parchment paper on top of the dough so that your dough is in between the two pieces. This is to avoid the dough sticking to the rolling pin. Press down to flatten the dough and then start rolling.
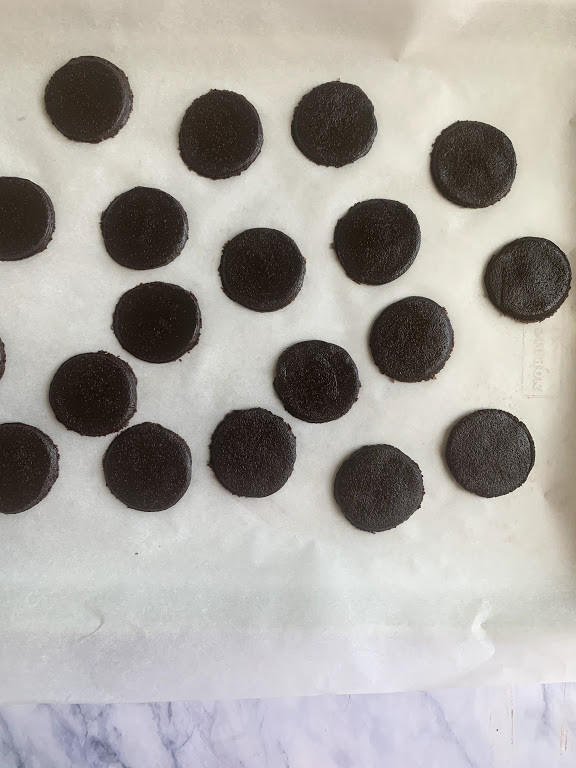
Roll out your dough to be 1/8 of an inch thick. No larger or the texture will be off. You can use a small cookie cutter for the cookies. I don’t have one so I just used the cap to a bottle of probiotics that was about 1 & 3/4 inches wide. It worked like a charm!
You will need to cut out your circles and re-roll the dough about 3 times until you have about 23-24 mini cookies.
Alternatively, if you don’t want to roll out the dough, you can use this method: for each cookie, scoop out about 1/2 tbsp, roll it into a ball and flatten it with the back of a plastic lid (i’ve used the peanut butter lid multiple times!) until your cookies are about 2 inches wide and 1/8 of an inch thick. Either way works just fine!
Baking the Cookies
Line a baking sheet with parchment paper and bake for about 14-15 minutes at 315 degrees. Since these are smaller and thinner, you’ll need to watch them closely so they don’t burn. When they come out of the oven, the edges should be somewhat firm and the middle will still be soft but they will harden as they cool.
Let the cookies cool on the baking sheet for about 5 minutes. Then transfer to a cooling rack for another 5 minutes or so.
The texture of the cookies when cooled should be a relatively soft center with crispy edges. They will harder with more crunch in the freezer. If they are too soft, pop them back into to oven for an additional minute or two.
Next, get started on melting your dark chocolate.
Adding the Mint Dark Chocolate Coating
Add your dark chocolate chips to a small-medium bowl. I recommend this dairy-free dark chocolate as it gives me the best results without having to use oil. I use a cereal bowl for this as I noticed anything bigger didn’t give me smooth melted chocolate. Microwave for about 1 minute and 15 seconds, stopping at the 30 second mark and 60 second mark to stir.
Stir well and then add your peppermint extract. Since some of the peppermint extract bakes out of the cookies, you will want to make sure to add enough to the dark chocolate. About 1/2 tsp should do it but add to taste.
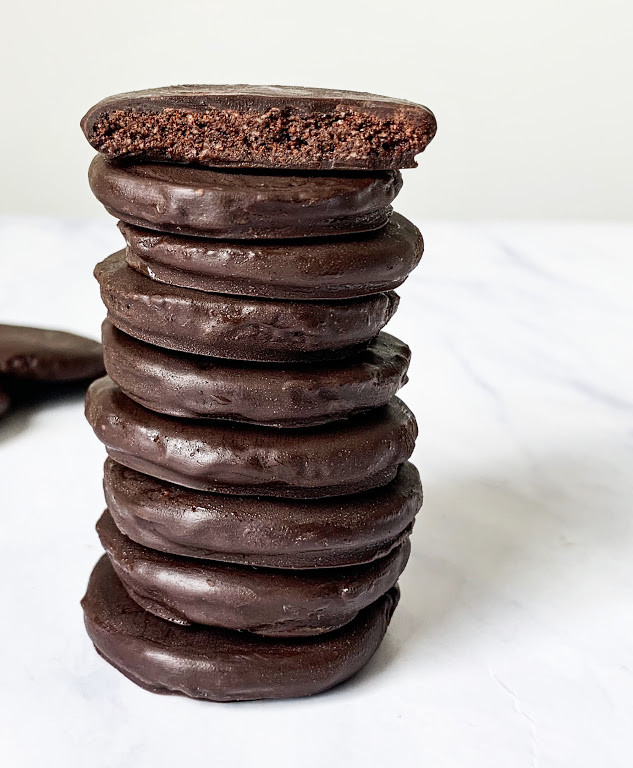
To coat, lay the cookie on a fork and dip the cookie into the chocolate. Flip the cookie over with the fork to coat the other side. Still using the fork, lift the cookie out and tap the fork on the edge of the bowl to get rid of the excess chocolate. I recommend a thin layer of chocolate (see my photos for reference) so at this point, I use another utensil or my finger to gently scrape off chocolate if the coating is too thick.
Place dipped cookies on a plate with parchment paper.
Once all cookies are dipped, freeze and enjoy! These are ready to eat after about 30 minutes in the freezer.
Notes
Since the cookies aren’t overly crispy on their own, freezing them gives them a nice crunch. This recipe was developed for storing them and enjoying them straight from the freezer. They will get too soft at room temperature.
If you make this recipe, don’t forget to take a photo and tag @wholesome.crumbs on Instagram!
Vegan Thin Mints [GF, Oil-Free]
Equipment
- You Will Need: a baking sheet, rolling pin, cookie cutter, parchment paper
Ingredients
Wet Ingredients
- 2 tbsp creamy peanut butter needs to be creamy and soft, not hard and dry. I get the best results with peanut butter that's been in the refrigerator
- 2 tsp vanilla extract
- 5 tbsp unrefined coconut sugar
- 1/4 tsp pure peppermint extract if using pure peppermint oil, use less!
- 2 tbsp plant-based milk
Dry Ingredients
- 1/2 cup plus 2 tbsp blanched almond flour
- 4 tbsp pure cacao powder
- 1/4 tsp mineral salt
- 1/8 tsp baking soda
Mint Dark Chocolate Coating
- 1 cup plus 2 tbsp dark chocolate chips
- 1/2 tsp peppermint extract or to taste
Instructions
- Add all wet ingredients to a medium bow. Whisk very well.
- Add all dry ingredients to the wet ingredients. Mix very well with a spatula. The dough will seem sticky but keep mixing and pressing and folding the dough with the spatula to form a big ball.
- Refrigerate the dough for about 15 minutes while you preheat the oven to 315 degrees and get your rolling supplies ready.
- When the dough is out of the fridge, start rolling. Lay a piece of parchment paper on the countertop. With your hands, roll the dough into a big ball and place it in the middle of the parchment paper. Add another piece of parchment paper on top of the dough so that the dough is in between the two pieces of parchment paper. This is so the dough doesn't stick to the rolling pin. Press down on the dough with your hands to flatten and then start rolling (or see alternative instructions above). You want your dough to be 1/8 of an inch thick (no larger or the texture will be off). I make my cookies about 1 & 3/4 inches inch wide. Use a cookie cutter or a bottle cap (see notes above) to make cookies. Re-roll dough and cut out cookies until you have about 23-24 small cookies.
- Bake for about 14-15 minutes on a cookie sheet lined with parchment paper. They will be relatively soft in the middle with firm edges when they come out of the oven, but will harden more as they cool. Cool on the baking sheet for about 5 minutes, then transfer to a cooling rack for about another 5 minutes.
- Add your dark chocolate chips in a medium bowl and microwave for about 1 minute and 15 seconds, stopping at the 30 second mark and 60 second mark to stir. Stir well and then add peppermint extract. Stir again.
- Start dipping your cookies following the instructions above. Lay the dipped cookies on a large plate lined with parchment paper.
- Freeze for about 30 minutes and enjoy! These cookies are meant to be kept and enjoyed straight from the freezer as they will get soft if not frozen.
Notes
- Make sure to read the detailed instructions in the “How to Make” section!
- Cookies will need to be kept in the freezer. Enjoy these straight from the freezer. These will get soft at room temperature.
These are SO good!
Yay! 🙂